In p5.js, we author the code reference you see on the reference page on the p5.js website by including them alongside the library’s source code as specialized comments. These reference comments include the description, the function’s signature (its parameters and return value), and usage examples. In other words, the content on each p5.js function/variable’s reference page is built from the reference comments in the source code.
This document will show you how to write and format the reference comments so that they can eventually be rendered onto the website correctly. You should follow this guide whenever you are editing or writing a reference for any p5.js function or variable.
A quick introduction to how reference comments work
When you look at the source code of p5.js, you will see many lines in the library being reference comments; they look like this:
/**
 * Calculates the sine of an angle. `sin()` is useful for many geometric tasks
 * in creative coding. The values returned oscillate between -1 and 1 as the
 * input angle increases. `sin()` takes into account the current
 * <a href="#/p5/angleMode">angleMode</a>.
 *
 * @method sin
 * @param  {Number} angle the angle.
 * @return {Number} sine of the angle.
 *
 * @example
 * <div>
 * <code>
 * function draw() {
 *   background(200);
 *
 *   let t = frameCount;
 *   let x = 50;
 *   let y = 30 * sin(t * 0.05) + 50;
 *   line(x, 50, x, y);
 *   circle(x, y, 20);
 *
 *   describe('A white ball on a string oscillates up and down.');
 * }
 * </code>
 * </div>
 *
 * <div>
 * <code>
 * function draw() {
 *   let x = frameCount;
 *   let y = 30 * sin(x * 0.1) + 50;
 *   point(x, y);
 *
 *   describe('A series of black dots form a wave pattern.');
 * }
 * </code>
 * </div>
 *
 * <div>
 * <code>
 * function draw() {
 *   let t = frameCount;
 *   let x = 30 * cos(t * 0.1) + 50;
 *   let y = 10 * sin(t * 0.2) + 50;
 *   point(x, y);
 *
 *   describe('A series of black dots form an infinity symbol.');
 * }
 * </code>
 * </div>
 */
They are usually followed by the actual JavaScript code that defines the function. Reference comments always start with /** and end with */, with each line in between the two starting with *.
Anything in a block in this manner will be interpreted as reference documentation. You may be familiar with this style of code comments through JSDoc. While p5.js does not use JSDoc, it uses a very similar tool called YUIDoc, which has a very similar reference syntax. In this style of reference comments, each comment block is further divided into individual elements, which we will have a look at next.
Reference comments block
Let’s break down the reference comments block above for the sin() function and see what each section does. You can compare what you see in the comments here and what you can see on the reference page for sin().
/**
 * Calculates the sine of an angle. `sin()` is useful for many geometric tasks
 * in creative coding. The values returned oscillate between -1 and 1 as the
 * input angle increases. `sin()` takes into account the current
 * <a href="#/p5/angleMode">angleMode</a>.
At the very top of the comment is the text description of the function. This description can contain both markdown syntax and HTML. The description should be concise and describe what the function does and, if necessary, some details about its quirks or behaviors.
 * @method sin
 * @param  {Number} angle  the angle.
 * @return {Number} sine of the angle.
A function will typically have the three sections above, each starting with an @ symbol followed by one of the following keywords:
@methodis used to define the name of the function, in this casesin(note that the function name does not include the brackets()).@paramis used to define the parameters or arguments that the function accepts.- Following the keyword
@param, stored in curly brackets{}is the type of the parameter. - After the type, the next word (angle) is the name of the parameter.
- After the name, the rest of the line is the description of the parameter.
- Following the keyword
@returnis used to define the return value of the function.- Following the keyword
@return, stored in curly brackets{}is the type of the return value. - After the type, the rest of the line is the description of the return value.
- Following the keyword
More generically for parameters, you should follow this format:
@param {type} name Description here.If the parameter is optional, add square brackets around the name:
@param {type} [name] Description here.Additional info: Constants
If the parameter takes one or more values defined in constants.js, then the type should be specified as {Constant} and the valid values should be enumerated in the comment following the either keyword, e.g.:
@param {Constant} horizAlign horizontal alignment, either LEFT, CENTER, or RIGHTFor return types you should follow this format:
@return {type} Description of the data returned.If the function does not return a value, the @return tag can be left out.
Additional info: Chaining
If the method returns the parent object, you can skip the @return tag and add this line instead:
@chainableAdditional signatures
If a function has multiple possible parameter options, you can specify each individually. For example, the background() function takes a number of different parameter options (see “Syntax” section on the reference page). Choose one version to list as the first signature using the template above. At the end of the first reference comment block, you can add additional signatures, each in its own block, using only the @method and @param tags following the example below.
/**
 * @method background
 * @param {String} colorstring color string, possible formats include: integer
 *                         rgb() or rgba(), percentage rgb() or rgba(),
 *                         3-digit hex, 6-digit hex
 * @param {Number} [a] alpha value
 */

/**
 * @method background
 * @param {Number} gray specifies a value between white and black
 * @param {Number} [a]
 */
Additional info: Multiple signatures
It is not necessary to create a separate signature if the only difference between two signatures is the addition of an optional parameter. Limit the use of this feature if possible because it can create unnecessary noise in the reference.
Reference for p5.js variables
So far, we have looked at how to write references for functions and constants. Variables follow the same structure but use different tags.
/**
 * The system variable mouseX always contains the current horizontal
 * position of the mouse, relative to (0, 0) of the canvas. The value at
 * the top-left corner is (0, 0) for 2-D and (-width/2, -height/2) for WebGL.
 * If touch is used instead of mouse input, mouseX will hold the x value
 * of the most recent touch point.
 *
 * @property {Number} mouseX
 * @readOnly
 *
 * @example
 * <div>
 * <code>
 * // Move the mouse across the canvas
 * function draw() {
 *   background(244, 248, 252);
 *   line(mouseX, 0, mouseX, 100);
 *   describe('horizontal black line moves left and right with mouse x-position');
 * }
 * </code>
 * </div>
 */
The start of the block contains the description of the variable (mouseX in this case). To define the name of the variable, we use @property instead of @method. @property follows the same syntax as @param for defining the type and its name. The @readonly tag is present on most p5.js variables and is used internally to indicate this value should not be overwritten directly by a library user.
Adding examples
One tag that is present in both sin() and mouseX’s reference comments that we have not talked about yet is the @example tag. This tag is where you define the code example(s) that is run when you visit the reference page.
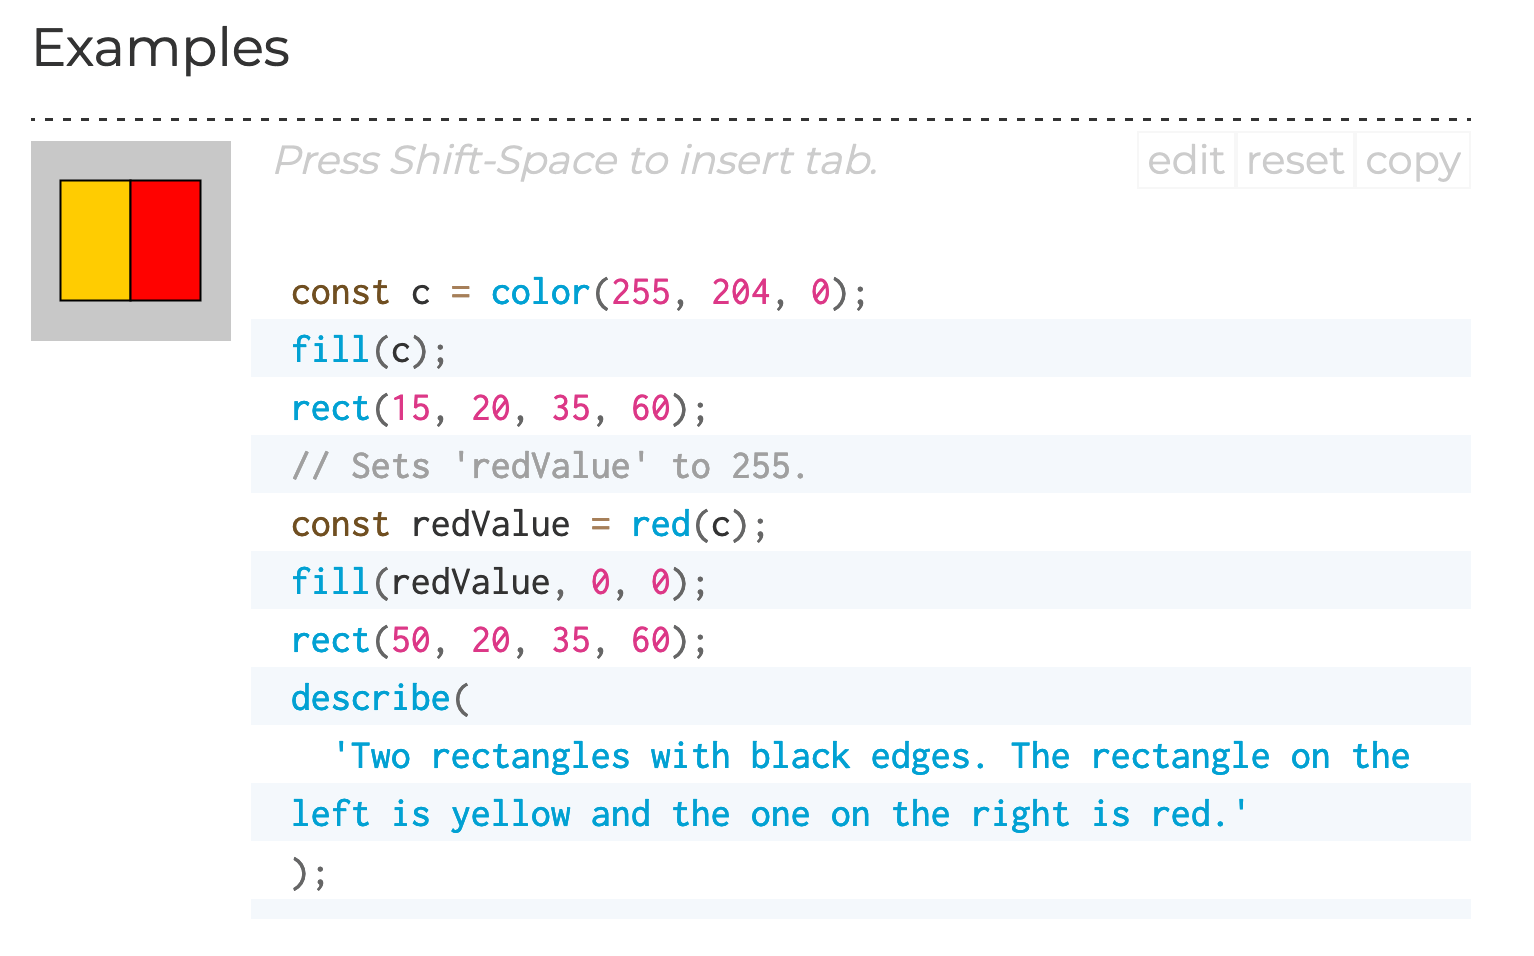
The relevant @example tag to create the above is as follows:
 * @example
 * <div>
 * <code>
 * const c = color(255, 204, 0);
 * fill(c);
 * rect(15, 20, 35, 60);
 * // Sets 'redValue' to 255.
 * const redValue = red(c);
 * fill(redValue, 0, 0);
 * rect(50, 20, 35, 60);
 * describe(
 *   'Two rectangles with black edges. The rectangle on the left is yellow and the one on the right is red.'
 * );
 * </code>
 * </div>
After the @example tag, you should start an HTML <div> tag followed by a <code> tag. In between the opening and closing <code> tag, you will insert the relevant example code. The basic principle of writing good example code for the reference is to keep things simple and minimal. The example should be meaningful and explain how the feature works without being too complicated. The example’s canvas should be 100x100 pixels and if the setup() function is not included, such as in the example above, the code will be automatically wrapped in a setup() function with a default 100x100 pixels gray background canvas created. We won’t go through the details about best practices and code style for the example code here; please see the reference style guide instead.
You can have multiple examples for one feature. To do so, add an additional <div> and <code> HTML block right after the first closed, separated by a blank line.
* @example
* <div>
* <code>
* arc(50, 50, 80, 80, 0, PI + QUARTER_PI, OPEN);
* describe('An ellipse created using an arc with its top right open.');
* </code>
* </div>
*
* <div>
* <code>
* arc(50, 50, 80, 80, 0, PI, OPEN);
* describe('The bottom half of an ellipse created using arc.');
* </code>
* </div>
If you do not want the reference page to execute your example code (i.e., you just want the code to show up), include the class “norender” in the <div>:
* @example
* <div class="norender">
* <code>
* arc(50, 50, 80, 80, 0, PI + QUARTER_PI, OPEN);
* describe('ellipse created using arc with its top right open');
* </code>
* </div>
If you do not want the example to be run as part of the automated tests (for example, if the example requires user interaction), include the class “notest” in the <div>:
* @example
* <div class='norender notest'><code>
* function setup() {
*   let c = createCanvas(100, 100);
*   saveCanvas(c, 'myCanvas', 'jpg');
* }
* </code></div>
If your example uses external asset files, put them in the /docs/yuidoc-p5-theme/assets folder (or reuse one already in there) then link to them with “assets/filename.ext” in the code. See the tint() reference for example.
Add a canvas description using describe()
Finally, for every example you add, you are required to use the p5.js function describe() in the example to create a screen-reader accessible description for the canvas. Include only one parameter: a string with a brief description of what is happening on the canvas.
* @example
* <div>
* <code>
* let xoff = 0.0;
* function draw() {
*   background(204);
*   xoff = xoff + 0.01;
*   let n = noise(xoff) * width;
*   line(n, 0, n, height);
*   describe('A vertical line moves randomly from left to right.');
* }
* </code>
* </div>
*
* <div>
* <code>
* let noiseScale = 0.02;
* function draw() {
*   background(0);
*   for (let x = 0; x < width; x += 1) {
*     let noiseVal = noise((mouseX + x) * noiseScale, mouseY * noiseScale);
*     stroke(noiseVal*255);
*     line(x, mouseY + noiseVal * 80, x, height);
*   }
*   describe('A horizontal wave pattern moves in the opposite direction of the mouse.');
* }
* </code>
* </div>
For more on describe() visit the web accessibility contributor documentation.
With all the above you should have most of the tools needed to write and edit p5.js reference comments. However, there are a few more specialized usage of JSDoc style reference comments that you may come across in p5.js. These are situationally useful and not something that you need often.
@private tag
You can use the @private if a property or variable is a private function or variable. If a feature is marked as @private it will not be included as part of the rendered reference on the website. The reason to use the @private tag to mark a reference comments block as private is when you document internal features for the library itself. For example, see the reference comments for _start below:
/**
 * _start calls preload() setup() and draw()
 *
 * @method _start
 * @private
 */
p5.prototype._start = function () {
@module and related tags
At the top of each source code file will be a @module tag. Modules correspond to a group of features in p5.js which on the rendered reference page on the website are split into the corresponding sections. Inside each module, there are additional submodules defined with the @submodule tag.
The @for tag defines the relationship between this module and the overall p5 class, effectively saying this module is a part of the p5 class.
The @requires tag defines the required imported modules that the current module depends on.
/**
 * @module Color
 * @submodule Creating & Reading
 * @for p5
 * @requires core
 * @requires constants
 */
The convention p5.js follows is that each subfolder in the src/ folder will be one @module while each file inside the subfolder will be its own @submodule under the overall subfolder’s @module. Unless you are adding new subfolders/files to the p5.js source code, you shouldn’t need to edit this reference comments block.
@class tag
Class constructors are defined with the @class tag and the @constructor tag. The format for this block is similar to how a function is defined with the @method block, the class’s name will need to be defined with the @class tag and the @constructor tag will indicate the class has a constructor function. See the example below for the p5.Color class:
/**
 * A class to describe a color. Each `p5.Color` object stores the color mode
 * and level maxes that were active during its construction. These values are
 * used to interpret the arguments passed to the object's constructor. They
 * also determine output formatting such as when
 * <a href="#/p5/saturation">saturation()</a> is called.
 *
 * Color is stored internally as an array of ideal RGBA values in floating
 * point form, normalized from 0 to 1. These values are used to calculate the
 * closest screen colors, which are RGBA levels from 0 to 255. Screen colors
 * are sent to the renderer.
 *
 * When different color representations are calculated, the results are cached
 * for performance. These values are normalized, floating-point numbers.
 *
 * <a href="#/p5/color">color()</a> is the recommended way to create an instance
 * of this class.
 *
 * @class p5.Color
 * @constructor
 * @param {p5} [pInst]                  pointer to p5 instance.
 *
 * @param {Number[]|String} vals        an array containing the color values
 *                                      for red, green, blue and alpha channel
 *                                      or CSS color.
 */
Generating and previewing the reference
The p5.js repository is set up so that you can generate and preview the reference without needing to build and run the p5.js website as well.
- The main command to generate the reference from the reference comments in the source code is to run the following command.
npm run docsThis will generate the necessary preview files and the main docs/reference/data.json file, which is the same file (after minification) that will be used to render the reference page on the website.
- For continuous work on the reference, you can run the following command.
npm run docs:devThis will launch a live preview of the rendered reference that will update each time you make changes (you will need to refresh the page after making changes to see them appear). This is useful, especially for previewing example code running in the browser.
- The main template files are stored in the
docs/folder and, in most cases, you should not make changes directly to files in this folder, except to add new asset files in thedocs/yuidoc-p5-theme/assetsfolder.
Next steps
For additional details about the reference system, you can checkout the documentation for JSDoc and YUIDoc.
For examples of issues related to the reference, have a look at #6519 and #6045. The contributor guidelines document is also a good place to start.