Introduction
Welcome! This tutorial provides an introduction to drawing color gradients in p5.js. It is the first part of the Drawing chapter, which will guide you through creating a sticker-based photo decorating app. For our first exercise, we’re going to use radial color gradients and blend modes to create lens flare stickers on top of a selfie you capture with your webcam. We’ll also use linear color gradients and blend modes to create a gradient filter on top of your selfie. For reference, a lens flare is that visual effect in photos or videos where bright light scatters in the camera lens, creating streaks, circles, or halos, often adding a dramatic or artistic touch to the image. A filter is an effect that can alter the pixels in a digital image, or overlay the image to alter its shades and colors.
A webcam snapshot of a white person with short dark curly hair wearing pink heart shaped glasses posing for a picture. There is a red to yellow linear gradient filter on top of the photo. Colorful circles are scattered on top of the image with a color gradient overlay. The circles have randomized radial color gradients inside them to mimic a camera's lens flare. Some color gradients are pink to purple, cyan to green, or yellow to orange.
Prerequisites
To follow along with this tutorial, you should have:
- Followed the tutorials in the Introduction to p5.js chapter, or have an understanding of basic concepts and best practices used when creating projects in p5.js.
- A desire to learn and experiment. Curiosity and a willingness to experiment are the most important prerequisites.
This tutorial uses the p5.js Web Editor and is designed for learners of all levels, so don’t worry if you’re new to coding – that’s what we’re here to guide you through!
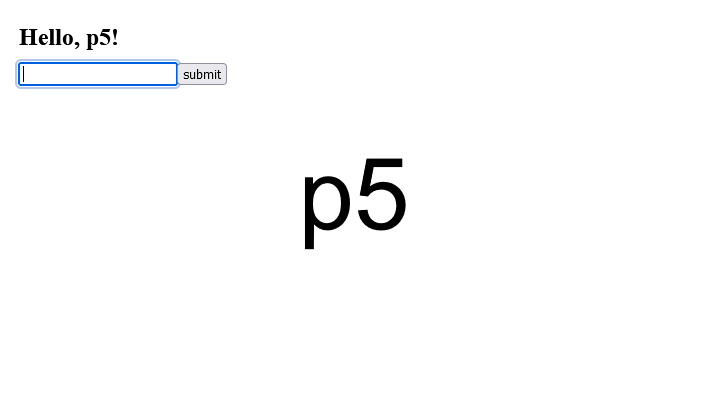
Step 1: Set up your p5.js Web Editor and webcam
- Go to the p5.js Web Editor.
- Log in to your account, or create a new one, to save your progress.
- Rename the project to “Color Gradient Stickers” or another name of your choosing.
- Set up the webcam:
- Call
createCanvas(640, 480). - Declare a global variable called
videousing the keywordlet. You’ll assign a value to this shortly. - In your
setup()function, assign acreateCapture(VIDEO)object to yourvideovariable by adding:video = createCapture(VIDEO).- This will initialize a
p5.MediaElementwith your webcam to feed the video from your webcam into your sketch using thevideovariable. - Visit the p5.js reference pages for
let,createCapture(), andp5.MediaElementto learn more.
- This will initialize a
- Set the position to (0, 0), pinning it to the top left of your canvas, using the
.position()method by adding.position(0, 0)insetup().- If you run the sketch now, you should see the video feed from your webcam appear in the preview window.
- See this example sketch that sets up your webcam to display on the canvas.
- Visit the p5.reference pages for
.position()andp5.Elementto learn more.
- Call
- Create a function to take a snapshot with your webcam.
- Declare a global Boolean variable called
snappedand assign it a value offalse.- This variable will keep track of when a snapshot is taken and is known as a state variable.
- Visit the MDN glossary for state machine for more information about states.
- Define a function called
takeSnap()below yoursetup()function.- Use an
ifstatement to check whether the user has already captured a snapshot by addingif (snapped === false) {}, or equivalentlyif (!snapped) {}, to the function body. - Capture a snapshot of your webcam feed and place it on the canvas by adding
image(video, 0, 0)to theifstatement’s body.- Your sketch tracks the state of your app using the
snappedvariable – whensnappedis equal tofalse, p5.js captures the snapshot usingimage().
- Your sketch tracks the state of your app using the
- Set
snappedtotrueafter capturing your snapshot by addingsnapped = trueunderimage().- This will let your app know that a snapshot was taken.
- Remove the video by adding
video.remove()as the last line in theifstatement.- This removes the video element in the
videovariable, so you’re looking at a still photo rendered byimage()and not the video feed.
- This removes the video element in the
- Use an
- Visit the p5.js reference for
function,if,image(), and.remove()to learn more.
- Declare a global Boolean variable called
- Create an HTML button to take a snapshot. This works using a few different parts:
The
createButton()function creates a new button.By typing the string
‘snap’inside this function, we label the new button “snap.”This new button is assigned to a variable named
snapButton.We add a
.mouseClicked()method to oursnapButtonand calltakeSnap()when the button is clicked.You can do this by adding the following code in
setup()://create a button with snap text on it let snapButton = createButton('snap'); //When we click the snap button, run the takeSnap function snapButton.mouseClicked(takeSnap);
Visit the p5.js reference pages for createButton() and mouseClicked() to learn more.
By creating an HTML button, we are inserting <button></button> inside our sketch page’s HTML and are using it to trigger the code for taking a snapshot of our webcam feed.
Your code can look like this:
// variable for video object
let video;
/* state variable
false - no snapshot has been taken
true - snapshot was taken */
let snapped = false;
function setup() {
createCanvas(640, 480);
//instantiate the VIDEO object
video = createCapture(VIDEO);
//draw it on the screen at 0, 0 so we can see webcam feed
video.position(0, 0);
    //create a button with snap text on it
let snapButton = createButton('snap');

//When we click the snap button, run the takeSnap function
snapButton.mouseClicked(takeSnap);
}
/*If we haven’t snapped a photo yet (snapped is false)
display the video frame for snapshot
set snapped to true and remove the video feed, leaving only the still photo we took */
function takeSnap() {
if (snapped === false) {
image(video, 0, 0);
snapped = true;
video.remove();
}
}
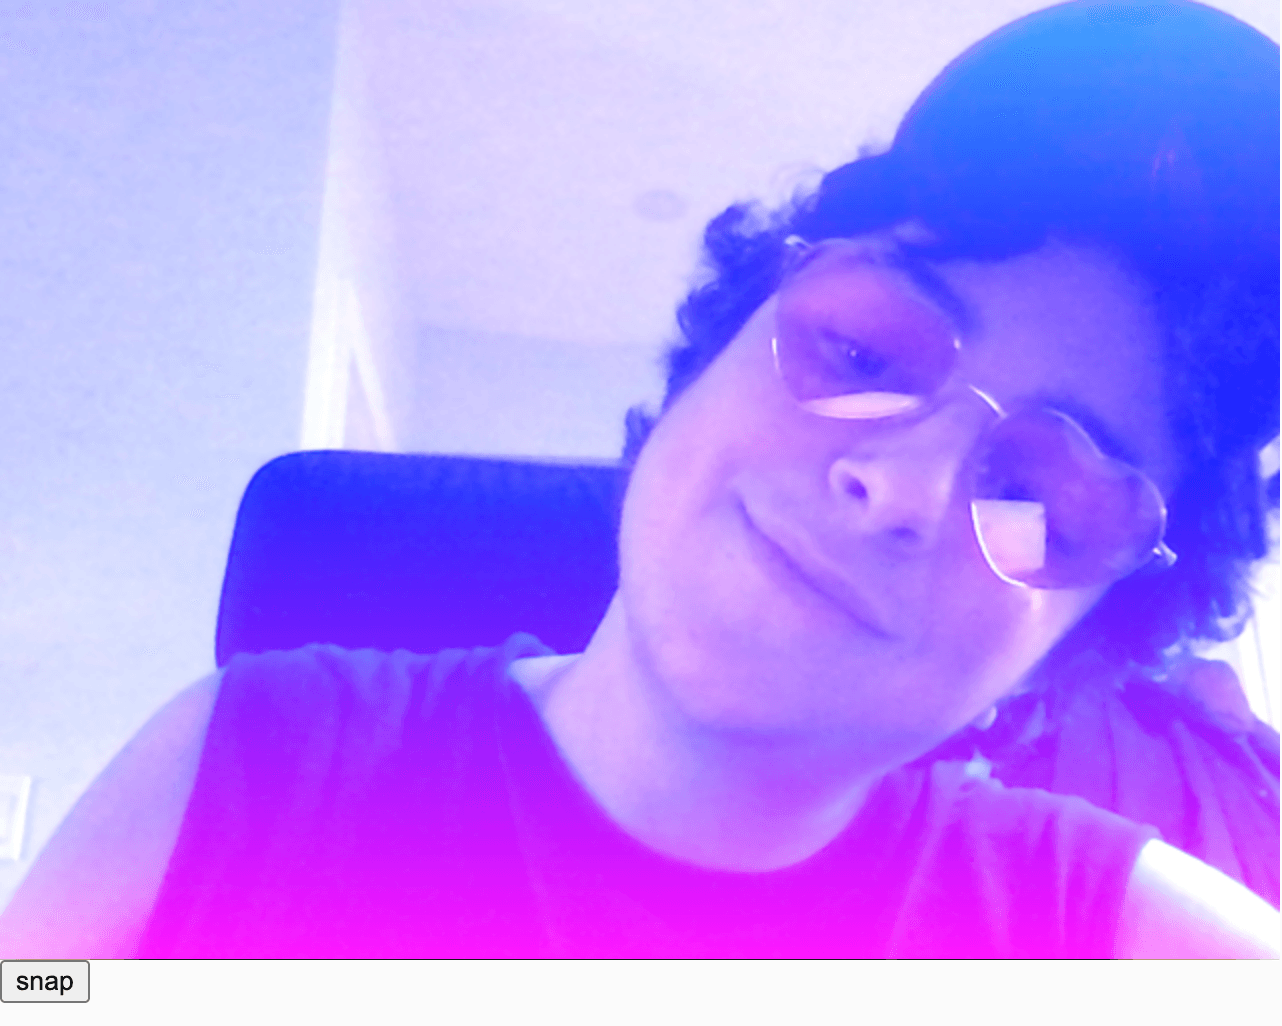
Hit play, and you’ll see your webcam feed displayed. Click the “snap” button to take a photo. We’ll layer stickers on top of this photo as we progress through the tutorial. This is what a selfie snapshot can look like:
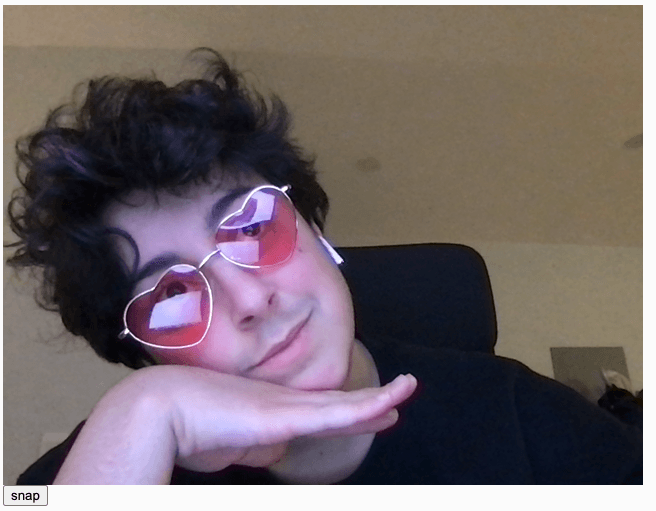
A white person with short dark curly hair wearing pink heart shaped glasses posing with one hand under his chin, softly smiles, and looks to the right.
Right now, our selfie is automatically sized to the dimensions of our canvas. Play with the width and height of the selfie by adding a width parameter and a height parameter after setting the position in the image(video, 0, 0) call. You can stretch and distort the selfie this way. Once you’ve done that, try duplicating the selfie by using the image function again, this time with different position and size parameters.
Step 2: Add a linear gradient filter on top of your photo
Next, we’ll use colorMode(), blendMode(), and lerpColor() to create a linear color gradient over your selfie.
- Add
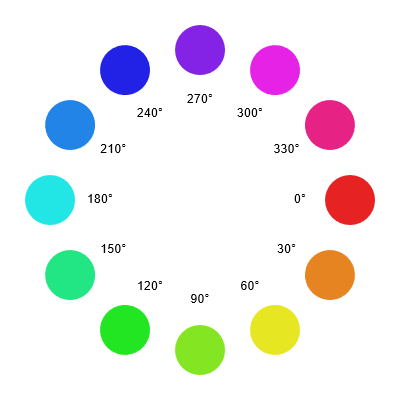
colorMode(HSB, 360, 100, 100);to your setup function. This will set thecolorMode()to use HSB (Hue, Saturation, Brightness) instead of the default RGB (Red, Green, Blue). The 360 is for our range of hues; it could be any number, but 360 is a common convention because this relates to degrees on a color wheel. The 100 values represent Hue and Saturation, respectively. Again, 100 is a popular convention because it’s convenient to think of these values spanning 0% to 100%. We haven’t mixed any colors yet, but we’ll use the system we’ve defined here further along in our code.
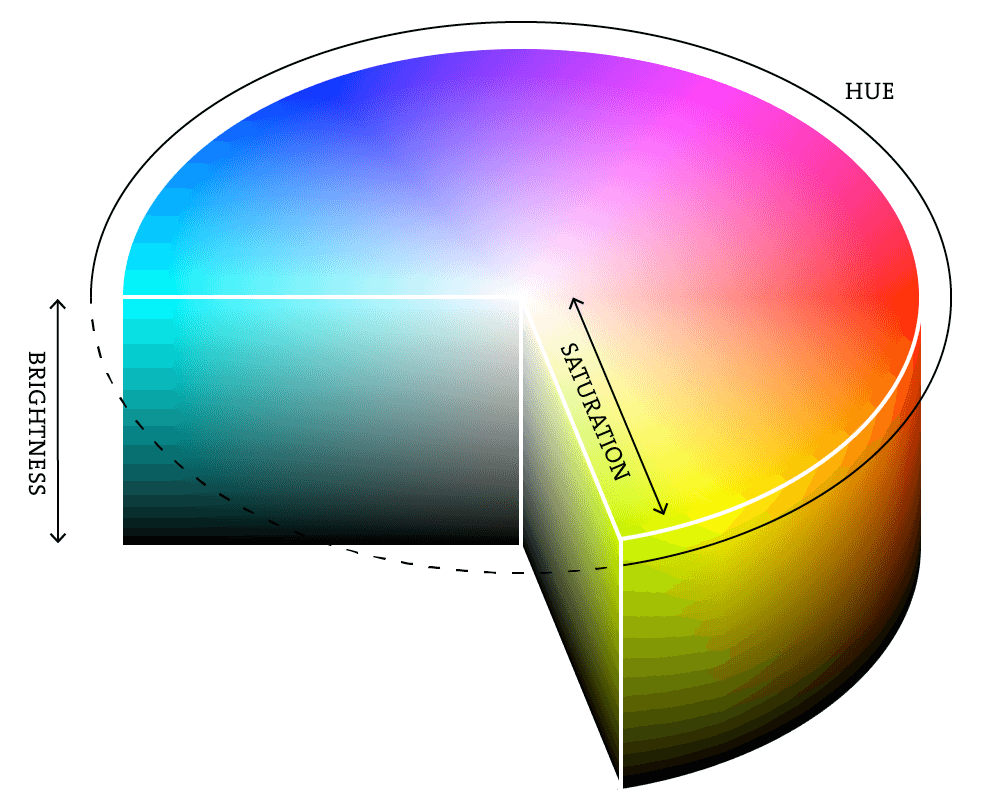
A 3-dimensional pie chart with a rainbow gradient describing brightness, hue, and saturation across the color spectrum
As you can see in the diagram above, Hue changes the color (0 to 360), Saturation changes the vibrancy of the color from white to full vibrancy (0 to 100), and Brightness changes the intensity of a color from black to full intensity (0 to 100).
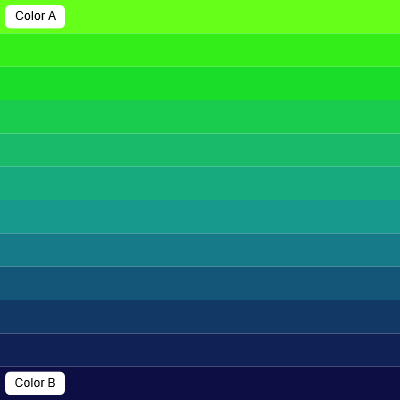
The following example uses HSB color to create a linear color gradient across the canvas. The hue value increases from left to right:
More variations:
- This example uses HSB color to create a linear color gradient across the canvas. The saturation value increases from left to right.
- This example uses HSB color to create a linear color gradient across the canvas. The brightness value increases from left to right.
Next, we’ll do something similar in our own sketch:
- Define a new function called
gradientFilter().- Inside this function, create variables called
startColorandendColor, and assign them the HSB values for the colors at each end of your gradient. In this code, it’s a red-to-yellow gradient. Both colors are fully saturated (vivid as opposed to grey) but with 50% brightness. You can experiment with different color values to see what you like. - We’ll use a
forloop to draw as many horizontal lines as there are pixels spanning the height of our canvas. Each of these lines will be stacked one below the other, and each will have a slightly different stroke color, creating a gradient effect. The loop runs until theyreaches the canvas height, and we’ll use thisyvalue to manipulate each line.for (let y = 0; y < height; y += 1)
- Inside the
forloop:- Create a variable called
amt. Use themap()function to remap our y variable that ranges from 0 toheight(480) to a range of 0 to 1. - Create a variable called
gradColor, and use thelerpColor()function to interpolate between ourstartColorandendColorby theamtvariable. Interpolate is a fancy way of saying that we’re gradually moving between two color values. - Set the
stroke()color togradColor. - Draw a line using the
line()function that starts at the x-y coordinates (0,y) and ends at (width,y).
- Create a variable called
- Inside this function, create variables called
- Add a call to
blendMode(LIGHTEST)to our setup function. Passing theLIGHTESTargument toblendMode()guarantees only the lightest color is drawn when graphics are layered on top of each other. This will make our linear gradient appear on top of our photo as a translucent overlay that interacts nicely with the light and dark values in our photo. - Define a
mousePressed()function.- Inside the function body, create an
ifstatement that checks whether thesnappedvariable equals true, indicating that the user has already taken a photo and is ready to apply a sticker – in which case, we can call thegradientFilter()function.
- Inside the function body, create an
Your code should look something like this:
    let video;

/* state variable
   false - no snapshot has been taken
   true - snapshot was taken */
let snapped = false;

function setup() {
  createCanvas(640, 480);

  //set the colorMode to HSB instead of RGB
  colorMode(HSB, 360, 100, 100);

  //instantiate the VIDEO object
  video = createCapture(VIDEO);

  //draw it on the screen at 0, 0 so we can see webcam feed
  video.position(0, 0);

  //create a button with snap text on it
  let snapButton = createButton("snap");

  //When we click the snap button, run the takeSnap function
  snapButton.mouseClicked(takeSnap);
  blendMode(LIGHTEST);
}

//Run the gradientFilter function when we press the mouse
function mousePressed() {
  if (snapped === true) {
    gradientFilter();
  }
}

/*If we haven’t snapped a photo yet (snapped is false)
  display the video frame for snapshot
  set snapped to true and remove the video feed, leaving only the still photo we took */
function takeSnap() {
  if (snapped === false) {
    image(video, 0, 0);
    snapped = true;
    video.remove();
  }
}

//Draws a linear gradient on the screen using a for loop and lerpColor
function gradientFilter() {
  let startColor = color(0, 100, 50);
  let endColor = color(60, 100, 50);
  for (let y = 0; y < height; y += 1) {
    let amt = map(y, 0, height, 0, 1);
    let gradColor = lerpColor(startColor, endColor, amt);
    stroke(gradColor);
    line(0, y, width, y);
  }
}
Hit play, and you’ll be able to take a snapshot and click on the canvas to apply your gradient filter. See how the gradient applies most dramatically to the darkest parts of the photo. This is due to the blendMode(), saturation, and brightness settings we are using.
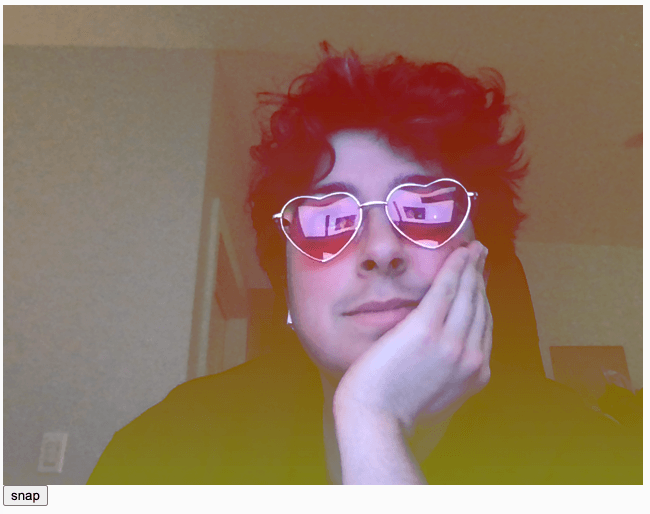
A white person with short dark curly hair wearing pink heart shaped glasses posing with his hand under his chin, with a vertical linear red to yellow gradient applied over the photo as a camera filter. Because of the LIGHTEST blendMode, the colorful gradient is especially visible on his dark hair and dark shirt.
A white person with short dark curly hair wearing pink heart shaped glasses posing with his hand under his chin, with a vertical linear red to yellow gradient applied over the photo as a camera filter. Because of the LIGHTEST blendMode, the colorful gradient is especially visible on his dark hair and dark shirt.
Alter the colors of our gradient by playing with the HSB values within startColor and endColor!
Step 3: Add color gradient stickers
Let’s use radial gradients to add some colorful lens flares to place as stickers over our photo.
- Define a new
lensFlare()function. - We’ll use the
circle()function to create our lens flares.- Create a variable called
diameterand set it to 50. - Create a variable called
h(we’re using this for hue) and set it to 150.
- Create a variable called
- Create a for loop that opens with
for (let d = diameter; d > 0; d -= 1). This loop will draw multiple circles with different stroke colors that smoothly blend, creating the effect of a rainbow-like fill.- Inside the for loop, write
fill(h, 90 90). This assigns thehvariable to hue, 90 to saturation, and 90 to brightness. - Write
circle(mouseX, mouseY, d). This sets our circle’s x-coordinate tomouseX, y-coordinate tomouseY, and diameter tod. - Set
hto equal(h + 1) % 360. We’re using a for loop to iterate through our HSB values, specifically the hue value. The modulo operator (%) helps cycle through hue values so that if any h value exceeds 360, it ‘wraps around’ to start at zero again, allowing the color blend to repeat.
- Inside the for loop, write
- To create size and color variation, set
diametertorandom(50, 200)andhtorandom(150, 360). - Inside the
ifstatement in yourmousePressedfunction, calllensFlare().
Your completed sketch code should look something like this:
    let video;

/* state variable
   false - no snapshot has been taken
   true - snapshot was taken */
let snapped = false;

function setup() {
  createCanvas(640, 480);

  //set the colorMode to HSB instead of RGB
  colorMode(HSB, 360, 100, 100);

  //instantiate the VIDEO object, and draw it on the screen at 0, 0
  video = createCapture(VIDEO);
  video.position(0, 0);

  //create a button with snap text on it
  let snapButton = createButton('snap');

  //When we click the snap button, run the takeSnap function
  snapButton.mouseClicked(takeSnap);
  blendMode(LIGHTEST);
  noStroke();
}

//Run the gradientFilter function when we press the mouse
function mousePressed() {
  if (snapped === true) {
    gradientFilter();
    lensFlare();
  }
}

/*If we haven’t snapped a photo yet (snapped is false)
  display the video frame for snapshot
  set snapped to true and remove the video feed, leaving only the still photo we took */
function takeSnap() {
  if (snapped === false) {
    image(video, 0, 0);
    snapped = true;
    video.remove();
  }
}

//Draws circles filled with radial gradients when we click the screen
//Each circle’s size and color are a random value contained in the diameter and h variables
function lensFlare() {
  let diameter = random(50, 200);
  let h = random(150, 360);
  for (let d = diameter; d > 0; d -= 1) {
    fill(h, 90, 90);
    circle(mouseX, mouseY, d);
    h = (h + 1) % 360;
  }
}

//Draws a linear gradient on the screen using a for loop and lerpColor
function gradientFilter() {
  let startColor = color(0, 100, 50);
  let endColor = color(60, 100, 50);
  for (let y = 0; y < height; y += 1) {
    let amt = map(y, 0, height, 0, 1);
    let gradColor = lerpColor(startColor, endColor, amt);
    stroke(gradColor);
    line(0, y, width, y);
  }
}
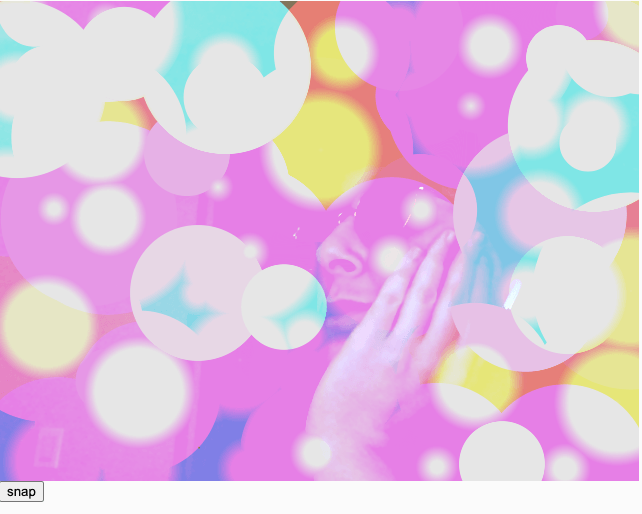
Hit play for the final result, and click on different parts of the photo to add several lens flare effects.
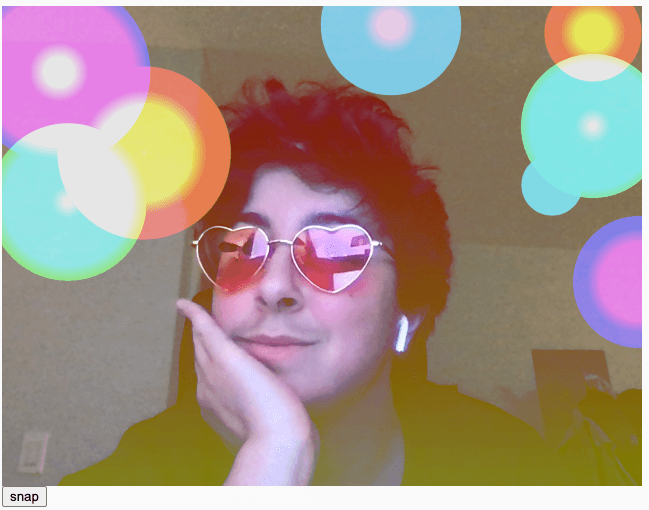
A webcam snapshot of a white person with short dark curly hair wearing pink heart shaped glasses posing for a picture. There is a red to yellow linear gradient filter on top of the photo. Colorful circles are scattered on top of the image with a color gradient overlay. The circles have randomized radial color gradients inside them to mimic a camera's lens flare. Some color gradients are pink to purple, cyan to green, or yellow to orange.
Keep adding stickers, and you’ll be able to cover the entire photo. Note how the LIGHTEST blendMode() interacts with the different layers of your canvas.
A white person with short dark curly hair wearing pink heart shaped glasses posing. Image with lens flares all over the photo, so the entire canvas is overtaken with multicolored lens flares, and we only see a faint image of the person underneath.
Change the blendMode to different settings to see how they affect the sketch! We chose LIGHTEST, but you can find the complete list of options in the p5.js reference page for blendMode.
Conclusion
In this tutorial, you learned how to instantiate a view of the webcam, use circle to create radial gradients, use line to create linear gradients, and use the color(), lerpColor(), and blendMode() functions to create lens flare stickers to apply to your photos. In our next tutorial, we’ll use beginShape(), endShape(), vertex(), bezier(), and bezierVertex() to create even more unique stickers!
Here’s example code for the completed project for reference.
Next Steps
Continue on to the next lesson: Custom Shapes and Smooth Curves!
Resources
Referencias Relacionadas
createCapture
Crea un elemento que "captura" el flujo de audio/video desde la cámara web y el micrófono.
createButton
Crea un elemento .
colorMode
Llamar a colorMode cambia la manera en que p5.js interpreta los valores de color.
blendMode
Sets the way colors blend when added to the canvas.
map
map() reasigna un número que se encuentra en un rango inicial, dentro de un nuevo rango.
lerpColor
Combina dos colores para encontrar un tercer color entre ellos.