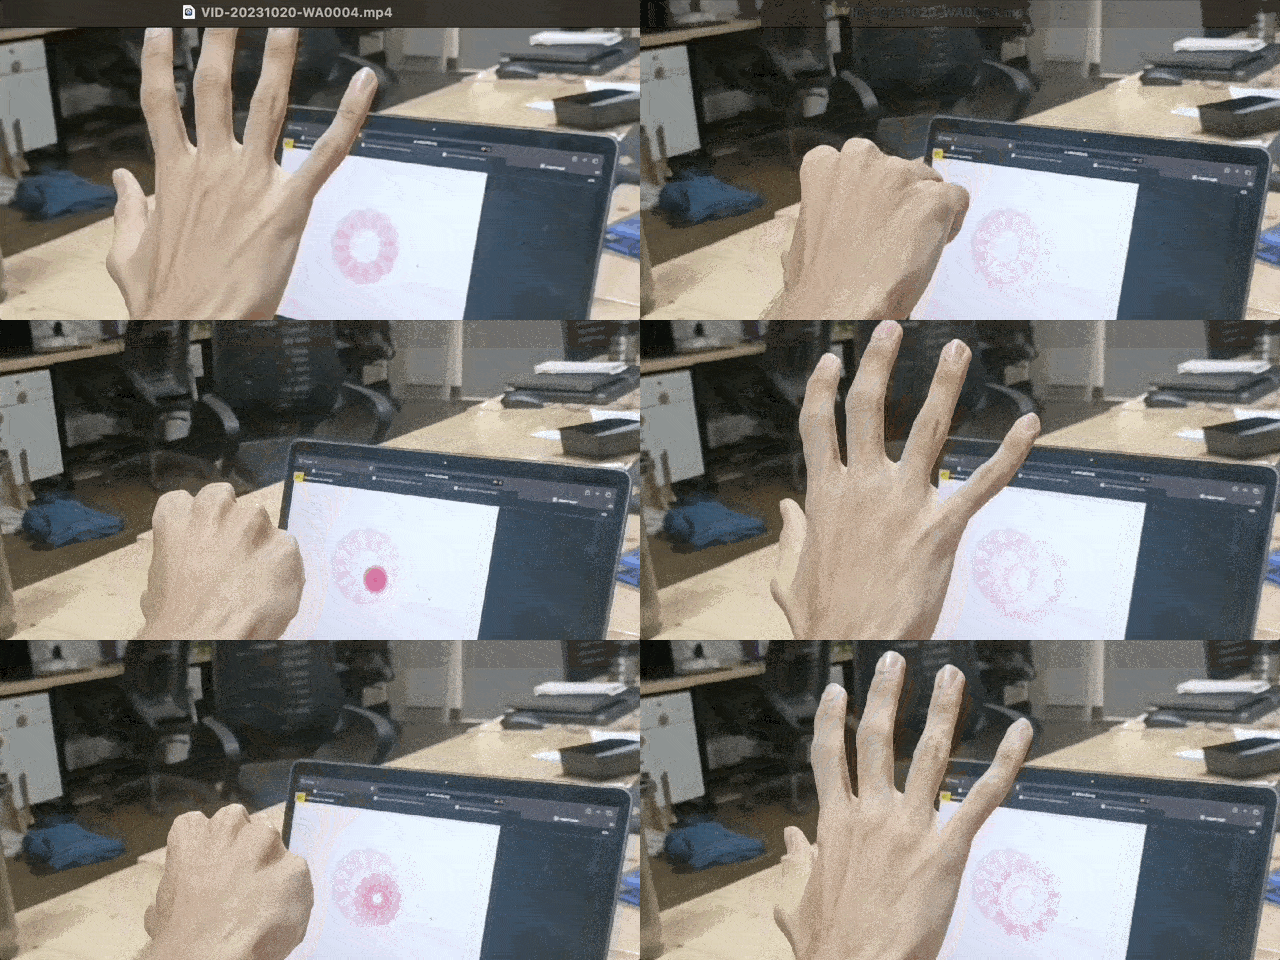
A hand controlling a flower made in p5.js with circles on a laptop screen. The flower opens as the hand is open and closed when the hand is a fist.
In this tutorial, we will learn how to use our hands to control sketches in p5.js. At the end, you’ll be able to make cool things like a flower that opens and closes on your computer screen just by moving your hand!
Picture this: You’re making a flower on your computer using p5.js. As you open your hand, the flower blooms. When you close your hand into a fist, the flower closes too.
Prerequisites
Before you begin, you should be familiar with:
- variables
- arrays
- loops
- objects
- mouse interactivity
You will need:
- A computer with a webcam
- An internet connection
- A p5.js editor. See Setting Up Your Environment.
So far, we’ve used input devices like the mouse and keyboard to control our sketches. In this tutorial, we’ll use the ml5.js library’s HandPose machine learning model to control p5.js sketches with our hands through a webcam.
Machine learning allows computers to recognize patterns from examples. The HandPose model has been trained to detect a hand and estimate the locations of 21 hand landmarks. We’ll use these landmarks much like mouseX and mouseY to create interactive sketches.
Example 1 - ml5.js with a Single Image
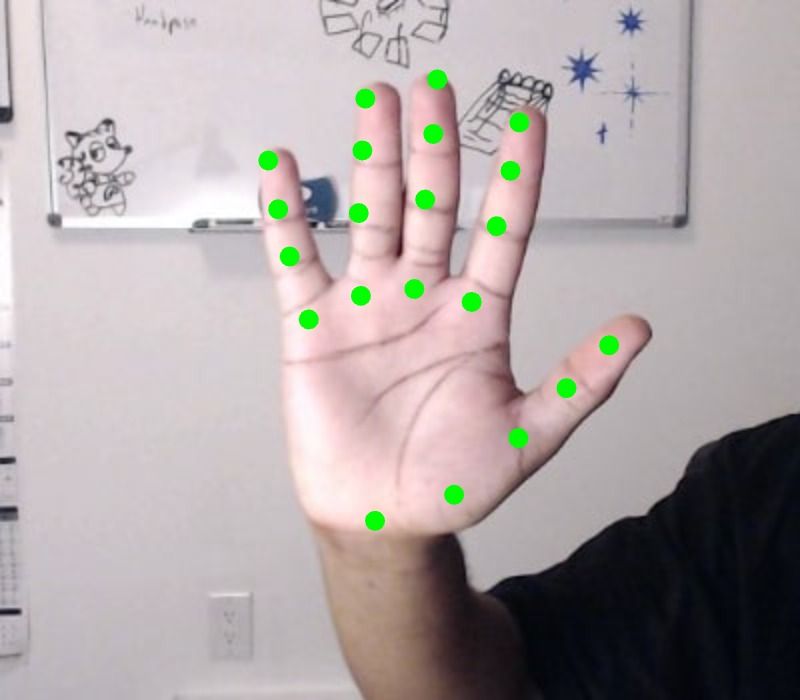
A hand with the tip of each finger and thumb identified with a different coloured dot.
You can follow along with the ml5.js HandPose Image Full Sketch example in the p5.js Web Editor by making a copy and naming it something like “Handpose Sketch”.
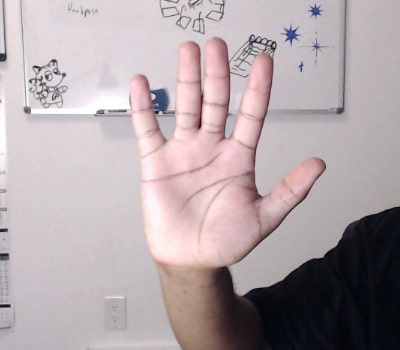
Download the image of the hand from this link and name it
hand.jpg. Upload it inside your data folder. If the image already exists in the folder, replace it.Update your index.html file to include script that calls the ml5.js api
    <html>
  <head>
    <meta charset="UTF-8" />
    <title>Handpose with Webcam</title>

    <script src="https://cdn.jsdelivr.net/npm/p5@2/lib/p5.js"></script>
    <script src="https://unpkg.com/ml5@1/dist/ml5.js"></script>
  </head>
  <body>
    <h1>Handpose with single image</h1>

    <script src="sketch.js"></script>
  </body>
</html>
- Update script.js file to use ml5 hand pose library
Deep Dive into ml5.js Sample Code
Let’s dive into how ml5.js works, especially with the HandPose model. ml5.js is a library that makes machine learning easy to use with p5.js, allowing your sketches to respond to images, sound, and video.
The HandPose model analyzes images or webcam video to detect hands. It identifies 21 keypoints on each detected hand, including the wrist, palm, and fingertips. Each keypoint has an x- and y-coordinate, and a corresponding 3D position is also available through keypoints3D. We can use these keypoints to create interactive sketches that respond to hand movements.
- First, the image is loaded, followed by the HandPose model. Since loading the model takes time,
awaitpauses the program until the model is ready. - Once the model has loaded,
handPose.detect()analyzes the image and stores the detected hand landmarks in thepredictionsvariable. - The
draw()function waits until at least one hand has been detected. It then displays the image, callsdrawKeypoints(), and stops looping withnoLoop(). - The
predictionsvariable contains the detected hand data, including an array of keypoints. To inspect this data, addconsole.log(predictions[0]);inside theif (predictions.length > 0)block indraw().
Step 2 - Let’s understand the data
Here’s the output of that console.log(predictions[0]):
    {
  keypoints: Array(21),
  keypoints3D: Array(21),
  handedness: "Left",
  confidence: 0.9955774545669556,
  wrist: Object…
}
When we run the program, it gives us array of objects that help us understand where different parts of the hand are:
confidence: This score tells us how certain the model is that it has detected a hand. A higher value means the model is more confident.keypoints: An array of 21 predicted points representing the hand. Each keypoint contains anxandycoordinate, along with a name identifying the landmark.keypoints3D: An array of the same 21 points in 3D space. Each point hasx,y, andzcoordinates, wherezrepresents the point’s estimated depth relative to the camera.handedness: Indicates whether the detected hand is predicted to be the left or right hand.wrist: An object containing the coordinates of the wrist landmark.
Example 2: Annotations
In the following example we draw the tip of each finger in a different color. Using the annotations, we get the array that contains the points for each finger. We already know that the tip of each finger is the last point in each array, and this point has x-y-z coordinates. Using the first two numbers for that point (the x-y coordinates), we can draw a circle right where the fingertip is. Full Sketch
Lets see what happens in the example code above:
- First, we add a function called
createFinger()that creates a finger object which has:- the name of the finger that correspond to the key in the
predictions[0].annotationsobject, - the points on finger which corresponds to the array for each finger,
- color of the dot for the finger you want to draw.
- the name of the finger that correspond to the key in the
Then we move to the drawKeypoints() function. Here’s what happens in that function:
- First, we add a condition to check if there is at least one prediction for the points on the hand. We assign the variable
predictionto the first such prediction - Then, we call the
createFinger()function in a loop for each finger to a list of finger objects. This creates a array of objects containing info about each of the fingers- Each finger object contains three properties: a name, its points, and a color (as seen in the
createFinger()function definition)
- Each finger object contains three properties: a name, its points, and a color (as seen in the
- Next, we have another loop to go through the fingers list and get the color for each finger. We then place that color in fill(). This makes sure that everything drawn after that line is drawn in that color
- Now we draw an circle using then x- and y-coordinates found in
finger.points[3], which is the tip of the fingertip.xcorresponds to the x-coordinate of the pointtip.ycorresponds to the y-coordinate of the point
Example 3: Hats
In this example we make our fingers wear hats. To do this, all we need to do is replace the circle at the tip of each finger with the picture of a hat. Full Sketch
Let’s understand the code in this example:
- First, we create a new variable to store the image we want to place on the fingertips. We load this image in
setup()usingloadImage(). - Next, we find the fingertip positions from the hand predictions, just like in the previous example.
- Then, instead of only drawing a circle, we place the image at each fingertip location.
- We resize the image using
hatSizeso that the original 980x980 image does not cover the whole canvas. - Finally, we adjust the image position by subtracting half of the image size from the x and y coordinates. This centers the image on the fingertip point instead of placing the top-left corner of the image there.
Example 4: Using a live Webcam feed
In this example, we replace the static image with a live webcam feed. Full Sketch
Example 5 : Hats using a live Webcam feed
Let’s change this code to add hats on each fingertip. Full Sketch Here are the steps:
Add a variable to store the hat image and load it
await loadImage()insetup()Update the HandPose model loading code to use
ml5.handPose()and start detecting hands from the webcam usingdetectStart().Add the
createFinger()function to organize each finger’s keypoints, color, and name.Update the
drawKeypoints()function:- Create an array of finger objects using the predicted keypoints for each finger.
- Access the last point in each finger’s array, which represents the fingertip.
- Draw the hat image centered on each fingertip.
Now we are using a live video feed, so the fingertips move as we move our hands!
试试这个!
Give each finger a different hat!Adding interactivity
Now that we understand the data returned by the ml5.js HandPose model, we can use it to interact with our sketches. If you’ve completed the Conditionals and Interactivity tutorial, you’ll notice that we’re using our hand instead of the mouse.
When working with the mouse, we used the mouseX and mouseY variables to track the cursor. Here, we’ll use the x- and y-coordinates of our index fingertip instead.
Example: Move a ball with your index finger
In this example, we’ll control a circle on the screen using the tip of our index finger. Full Sketch
Starting from the previous webcam example, we make a few changes:
- Replace the
drawKeypoints()function with a newdrawObject()function. - In
drawObject(), access the index fingertip by selecting the index finger:let tip = prediction.index_finger_tip; - Draw a larger ellipse (33 × 33 pixels) at the fingertip using
tip.xandtip.y. - Replace the call to
drawKeypoints()withdrawObject()inside thedraw()function.
Now, moving your index finger moves the circle around the screen.
Example: Move three balls with three different fingers
In this example, we control three circles using our index, middle, and ring fingers. Full Sketch
Starting from the previous example, we only need to update the drawObject() function:
- Instead of getting only the index fingertip, also get the middle and ring fingertips:
let indexTip = prediction.index_finger_tip; let middleTip = prediction.middle_finger_tip; let ringTip = prediction.ring_finger_tip; - Draw an ellipse at each fingertip using the
xandycoordinates of each point.
Now, moving any of these three fingers moves its corresponding circle.
试试这个!
Change the size of the circle based on the finger pointing to it. The pinky can create a small circle, and the thumb can create the largest.
Example: Move object by pointing to where you want it
In this example, we draw a rectangle on the left or right side of the screen depending on where the index finger is pointing. Full Sketch
Starting from the “Move a ball with your index finger” example, we modify the drawObject() function:
- First, we make the circle smaller (20 pixels) so it acts as a tracker for the fingertip position.
- Next, we use a conditional statement to check the x-coordinate of the index fingertip.
- If the fingertip is on the left half of the canvas (
x < width / 2), we draw a rectangle on the left side. - Otherwise, we draw a rectangle on the right side.
- If the fingertip is on the left half of the canvas (
As you move your index finger across the screen, the rectangle changes sides based on your fingertip position.
试试这个!
Create a small game. Divide your canvas into two and make a ball fall from the top of the screen. Each ball has a color, and based on the color you need to send it to the right or left by pointing to that side of the screen. Maintain a score.
Example: Change object color by pointing to it
In this example, we change the color of an object when we point at it. Full Sketch
Starting from the previous example, we modify the sketch to detect when our fingertip is inside a rectangle:
- First, we add
background(220)in thedraw()function so that we only see the object and not the webcam feed. - Next, we update the
drawObject()function:- We create a rectangle at position
(150, 150)with a width of100and a height of200. - We use a conditional statement to check if the index fingertip is inside the rectangle.
- If the fingertip is inside the rectangle, we change the fill color to yellow. Otherwise, the rectangle stays gray.
- We create a rectangle at position
Move your finger in front of the camera and use the tracking dot to point at the rectangle. When your fingertip enters the rectangle, it changes color!
试试这个!
Control the Recursive Tree example or the direction of these Smoke Particles with your finger.
Example: Making a flower bloom
In this example, we use the distance between our thumb and pinky fingers to control a flower blooming animation. Full Sketch
Starting from the previous sketch, we add variables to control the flower’s petals, size, and bloom behavior.
In the drawObject() function:
- We start by setting
targetSizeto0, which means the flower begins closed. - We find the positions of the thumb and pinky fingertips using
prediction.keypoints. - We calculate the distance between these two points:
- If the distance is larger than our threshold, we know the hand is open and set
targetSizeto200. - If the hand is closed, the target size stays
0, causing the flower to close.
- If the distance is larger than our threshold, we know the hand is open and set
- We move the drawing origin to the center of the canvas and use
lerp()to smoothly animate the flower between closed and open states. - Finally, we draw each petal in a circle by drawing a circle and rotating the canvas before drawing the next petal.
Run the code and try making a fist, then opening your hand. Watch the flower bloom as your hand opens!
试试这个!
- Create a sketch with many seeds (you can represent these with circles). Point to one and then use your fingers to make it bloom.
- In your collection of p5.js sketches, find one that uses the mouse to interact with the sketch. Use your hands instead.
Next Steps
Explore the BodyPose and Facemesh models in the ml5.js library. The BodyPose model detects points on the whole body, in the exact same way that HandPose detects it for the hand. The Facemesh model returns points on the face. You should understand the data that these models return and use them in your sketches.
试试这个!
Using the Facemesh model, create the following:
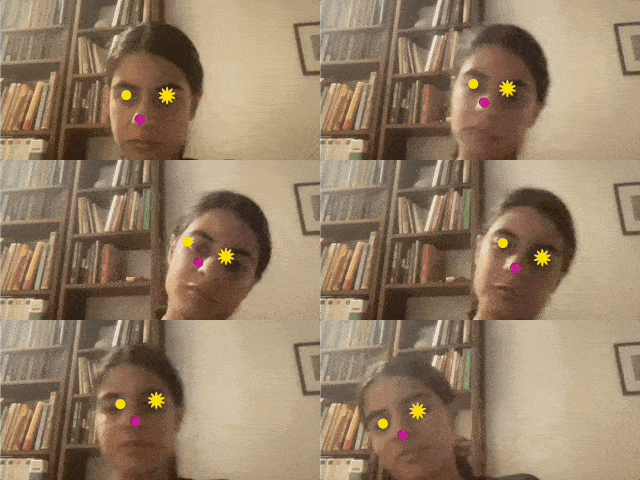
A person's face moving from side to side with a purple dot on the nose, a yellow dot on the right eye, and a yellow flower on the left eye