Sometimes in a sketch, you might want to draw to an image instead of directly to the screen. This allows you to use the image as a texture on 3D shapes, achieve complex rendering effects, efficiently repeat the image multiple times, and more.
In 2D mode, you can use a p5.Graphics to achieve this. While they also work in WebGL mode, you can use a p5.Framebuffer for better performance and flexibility.
What makes Framebuffers special?
Framebuffers live on your computer’s GPU (Graphics Processing Unit), the part of your computer that specializes in drawing pixels of images as fast as possible in parallel. The JavaScript you write for your sketch runs on your computer’s CPU (Central Processing Unit) and does only one thing at a time. Because Framebuffers live on the GPU, where we’re already doing most of the computation, you can write to and read from Framebuffers quickly without your computer having to move lots of data around between the CPU and GPU!
Framebuffers can also contain more information than a typical image or canvas. You can use higher-precision floating point numbers to store colors more accurately without running into weird visuals from rounding errors. They can also store 3D depth information about the contents drawn in them, which can help you create visual effects like depth of field and shadows.
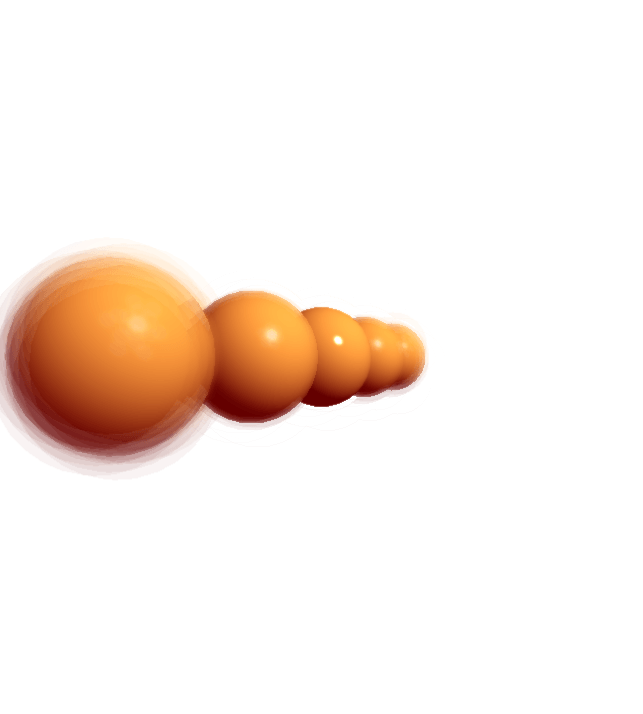
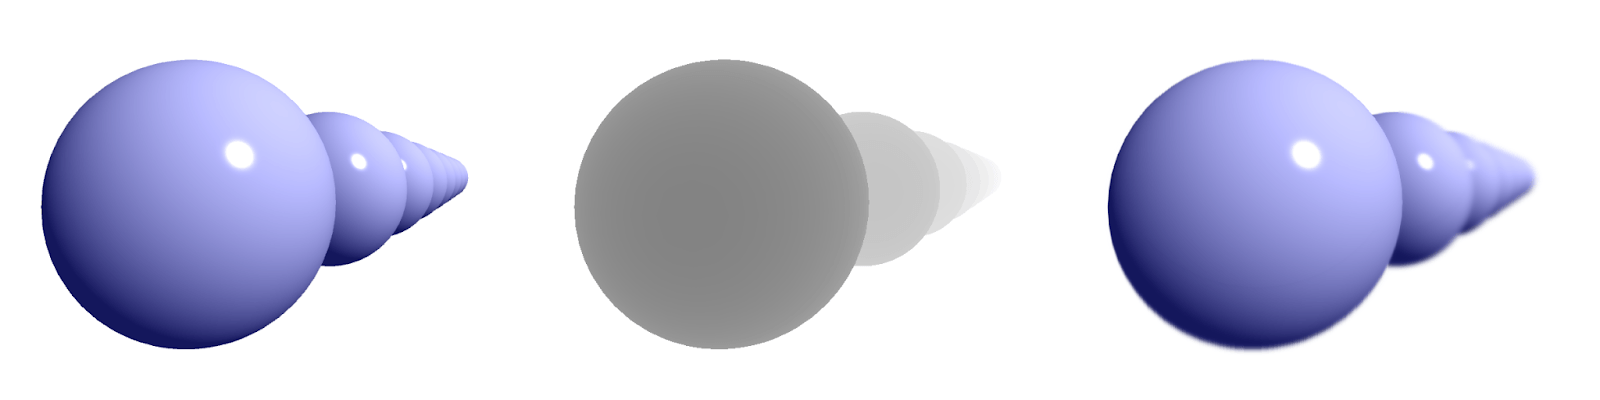 Three renderings of a line of spheres going off into the distance. The first shows them in focus and in color. The second shows them monochrome, getting more white as they go into the distance. The final one is in color, with spheres getting more blurred as they go into the distance. | ||
Framebuffer color | Framebuffer depth | Final image with focal blur using color + depth |
|---|---|---|
Using a p5.Framebuffer
A p5.Framebuffer is a surface you can draw to, similar to the main canvas. Drawing to the main canvas is like drawing on a sheet of paper. When you call begin() on a p5.Framebuffer, it’s like laying a fresh sheet of paper on top of the original, which will collect any new things that get drawn. Calling end() on a p5.Framebuffer will remove that sheet again so that subsequent drawing will go right to the main canvas again.
You can create a p5.Framebuffer with the createFramebuffer() function. You can optionally pass an object in as a parameter to specify a width and height. By default, p5.Framebuffers are the same size as the main canvas. There are other options you can add to this object to control how color and depth information is stored, which we’ll get into later. Check out the createFramebuffer() documentation for the full reference.
You may already be familiar with drawing to p5.Graphics objects. Here’s a comparison of some code using p5.Graphics as a texture, and what the equivalent p5.Framebuffer code looks like:
Using p5.Graphics
    let layer;
function setup() {
  createCanvas(200, 200, WEBGL);
  layer = createGraphics(200, 200);
  describe('a rotating red cube with yellow dots on each face');
}
function draw() {
  let t = millis() * 0.001;
  layer.background('red');
  layer.noStroke();
  layer.fill('yellow');
  for (let i = 0; i < 30; i += 1) {
    layer.circle(
      map(noise(i*10, 0, t), 0, 1, 0, width),
      map(noise(i*10, 100, t), 0, 1, 0, height),
      20
    );
  }

  background(255);
  lights();
  noStroke();
  texture(layer);
  rotateX(t);
  rotateY(t);
  box(100);
}
Using p5.Framebuffer
    let layer;
function setup() {
  createCanvas(200, 200, WEBGL);
  layer = createFramebuffer();
  describe('a rotating red cube with yellow dots on each face');
}
function draw() {
  let t = millis() * 0.001;
  layer.begin();
  background('red');
  noStroke();
  fill('yellow');
  for (let i = 0; i < 30; i += 1) {
    circle(
      map(noise(i*10, 0, t), 0, 1, -width/2, width/2),
      map(noise(i*10, 100, t), 0, 1, -height/2, height/2),
      20
    );
  }
  layer.end();

  background(255);
  lights();
  noStroke();
  texture(layer);
  rotateX(t);
  rotateY(t);
  box(100);
}
Result
By default, p5.Framebuffers are not drawn to the screen. The main canvas is the only thing shown at the end of draw(). To make the contents of a p5.Framebuffer visible, it has to be stamped upon the main canvas. This is typically done with a call to image(yourFramebuffer, x, y, width, height). Similar to the main canvas, a p5.Framebuffer only gets cleared when you ask it to be cleared, so you can stamp it on the main canvas as many times as you want, like in the example below.
| Main canvas |
| |||
|---|---|---|---|---|---|
| Initially, anything that gets drawn goes to the main canvas. On the right, we’ve indicated the surface that is currently being drawn to by outlining it in red. | ||||
| By calling | ||||
| This clears the |
| |||
| By calling |
| |||
| This draws a 4-by-4 grid on the main canvas, drawing a copy of the |
|
| ||
|
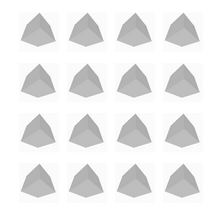
Can you simulate the vision of a fly by drawing a p5.Framebuffer many times in a honeycomb pattern?
Sketching with Feedback
Video feedback is a technique where the previous frame of a video gets used when drawing the next frame. This can be used to produce visuals that look like they trail off to infinity. The effect looks similar to when you stand between two mirrors.
To use feedback in a sketch, you typically draw to a p5.Framebuffer layer, so you have an image of the current frame. Then, when drawing to the next frame, you can add the previous frame to your drawing by using the image of the previous frame.
The fastest way to do this is to keep two layers around, one for the previous frame and one for the next frame. At the start of draw(), swap the two layers: what used to be the next frame is now the previous frame, and you are free to clear the next frame and draw a new image to it. In computer graphics, this technique is called “ping-ponging.”
Lots of music player software uses feedback to create audio visualizations. Try using feedback in a sketch that reacts to music!
Here are some tips that will help as you create more advanced feedback effects.
Fading with Feedback: Use FLOAT Precision
p5.Framebuffers are especially good for feedback because they can store images as higher precision floating-point numbers, which you can specify with createFramebuffer({ format: FLOAT }). Normally, the red, green, and blue values of colors are stored as integers between 0–255. Each time you draw an image, the colors get rounded into that range. A frame can be drawn and redrawn many times in a feedback sketch. This can accumulate lots of rounding errors, sometimes preventing colors from fully fading out. That problem goes away when you use float precision!
Feedback in 3D: Remember Depth
In the example above, we drew the previous frame into the next frame using image(prev, 0, 0). This draws a rectangle on the screen, which takes up 3D space. If you then try to draw something further away from the camera, it will not show up, because the rectangle is blocking it.
| One way to make sure everything else you draw goes in front of the rectangle is to draw the rectangle farther back but scaled up so that it appears the same size. |
| Another way is to call |
Sketching with Depth
When you draw to a p5.Framebuffer, you can also record geometry depth in 3D space, stored as a number between 0 and 1. You can read this into a shader by using the depth property of a p5.Framebuffer. Depth information can also be used for debugging, as it gives a quick sense of how far away objects are. In the example below, try clicking and holding on the canvas to visualize the depth values.
Depth information can be useful if you want to change an image based on how far from the camera things are. One common effect that uses this is fog, where objects placed further away are tinted a fog color.
If you pass both the color and depth properties of a framebuffer into a shader, the original color can be read via texture2D(color, vTexCoord) as a vec4. Using the same coordinate, the depth of that pixel can be read using texture2D(depth, vTexCoord).r, reading just the red channel to get a single float.
If you want to customize how close to or far from the camera an object needs to be to get depth values of 0 or 1, specify near and far values in perspective().
Depth-based blur shaders are more advanced and are beyond the scope of this tutorial. Can you make a moody, rainy scene using a fog shader to add to the atmosphere?
Conclusion
If you’re sketching in WebGL mode and need to draw to an image, consider using createFramebuffer() as a way to make your sketch run fast and give everyone the best viewing experience possible.
We hope the new techniques framebuffers make possible inspire you and that you create art using them!
Glossary
GPU
The GPU (Graphics Processing Unit) is a piece of hardware that is particularly well suited for performing many calculations in parallel, making it powerful for 3D graphics.
Framebuffer
A surface that can be drawn to, similar to a p5.Graphics, but that lives on the GPU to take advantage of WebGL hardware acceleration.
Depth
A measurement of how far away from the camera a shape is. A framebuffer stores this measurement for every pixel in its image.
Ping-Ponging
A programming pattern in computer graphics when one needs to draw the next frame while referring to the previous frame. This is done by switching every frame which framebuffer refers to the previous frame, and drawing the next frame to the remaining one.