Modern computers come with a special piece of hardware called the Graphics Processing Unit, or GPU. Shaders are special programs that run on it and can do incredible things. They take advantage of the GPU to process many pixels at once in parallel, making them fast and particularly well suited for certain tasks in computer graphics, like generating noise, applying filters like blur, or shading polygons.
Shader programming can feel daunting at first, requiring a different approach than the 2D drawing of p5.js. This tutorial will outline the basics of shader programming and point you towards other resources.
Setup
The way to program the GPU in your browser is by using an API called WebGL. p5.js is a great tool for working with shaders because it handles a lot of the boilerplate WebGL setup, letting you focus on the shader code itself. Before we can get started with shaders we have to set up our p5.js canvas so that it uses WebGL mode. We do this by adding the WEBGL constant as the third parameter in createCanvas().
    ...

function setup() {
  createCanvas(200, 200, WEBGL);
}

...
A shader program consists of two parts, a vertex shader and a fragment shader. The vertex shader is a program that runs once for each vertex in a piece of geometry and determines where it gets drawn on the screen. The fragment shader is a program that runs once for every pixel in that geometry and determines its color.
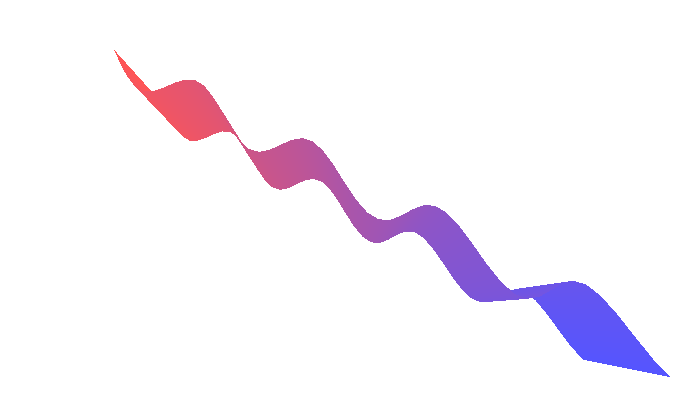
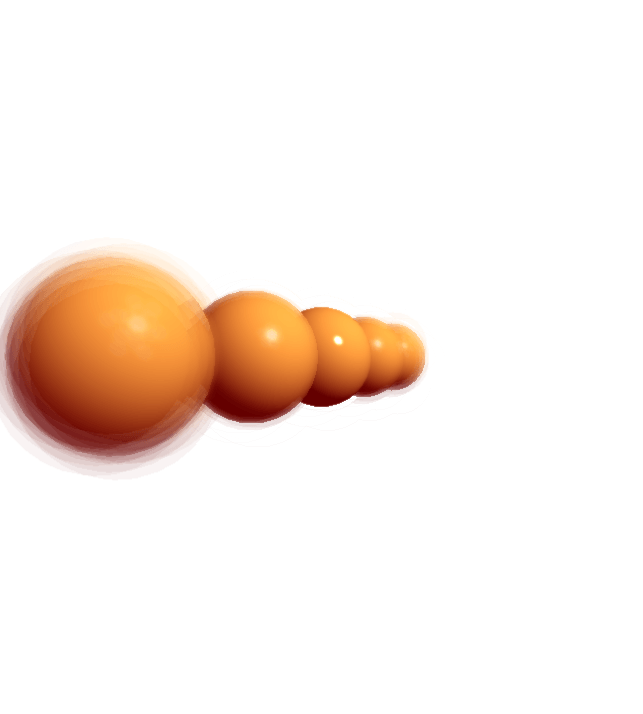
 A red sphere |  A red sphere that wobbles and distorts over time |  A silhouette of a wobbly sphere, colored in with red and blue stripes |
Original shape | A custom vertex shader can adjust the positions of vertices within a shape | A custom fragment shader can adjust the colors inside a shape |
Each of these live in separate files and are loaded into p5.js using the loadShader() function. Once a shader is loaded, it can be used within setup() or draw(). The following example will show how to set up a basic shader within p5.js:
    let myShader;
function preload() {
  // load each shader file (don't worry, we will come back to these!)
  myShader = loadShader('shader.vert', 'shader.frag');
}
function setup() {
  // the canvas has to be created with WEBGL mode
  createCanvas(windowWidth, windowHeight, WEBGL);
}
function draw() {
  // shader() sets the active shader, which will be applied to what is drawn next
  shader(myShader);
  // apply the shader to a rectangle taking up the full canvas
  plane(width, height);
}
There is also an additional function called createShader(), which can be used to load shaders directly from strings defined in your sketch.
Writing Shaders
Now, we’ll look at what goes into the vertex and fragment shader files we referenced in loadShader().
Shading Language (GLSL)
Shader files are written in the Graphics Library Shading Language, or GLSL (based on OpenGL 2.0 and GLSL ES 1.00), and have a very different syntax and structure than we are familiar with. GLSL has a syntax that resembles C, which means it comes with a handful of concepts that aren’t present in JavaScript.
For one, the shading language is much more strict about types. Each variable you create has to be labeled with the kind of data it is storing. Here is a list of some of the common types:
    vec2(x,y)     // a vector of two floats
vec3(x,y,z)   // a vector of three floats (could also be r,g,b)
vec4(x,y,z,w) // a vector of four floats (could also be r,g,b,a)
float         // a number with decimal points
int           // a whole number without decimal points
sampler2D     // a reference to a texture
mat2          // a 2x2 matrix
mat3          // a 3x3 matrix
mat4          // a 4x4 matrix
bool          // true or false
In general shading languages are much more strict than JavaScript. A missing semicolon is not allowed and will result in an error message. You can’t use different types of numbers, like floats or integers interchangeably. It also will complain about floats that aren’t defined with a decimal place in them, so you will find yourself writing numbers like 0.0 or 1.0 often.
Here are some things that are different in GLSL:
Javascript | GLSL | |
|---|---|---|
All variables need types. |
|
|
Functions must declare the types of their parameters, and their return value. |
|
|
You have to convert between integers and floats yourself. |
|
|
Loops in GLSL have to stop at a constant value. If you want to end conditionally, you can |
|
|
While there are many restrictions, in some ways, GLSL can be nicer to work with! When using vectors, GLSL includes a number of helpful shortcuts:
If you have a |
|
If you want to create a vector where all of its values are the same, you don’t need to specify the same value repeatedly, just once will do. |
|
You can get smaller vectors out of a larger vector by using something called “swizzling,” where you chain multiple property values together after a |
|
Vertex Shaders
Here’s a simple vertex shader that applies the transformations and camera perspective supplied by p5.js:
| The shader starts with a |
| The attributes of the shader contain values that change per vertex, which p5.js uses to share information like the position of each vertex. The attribute in this shader is a |
| The uniforms of a shader are values that are constants for the whole shape being drawn. Each one in this shader happens to be a |
| All vertex shaders require a function, |
Don’t worry if this doesn’t make a ton of sense yet. The vertex shader plays an important role but it is often just responsible for making sure what we create in our fragment shader displays properly on the geometry. You’ll probably reuse the same vertex shaders in many of your projects. Below is a standard vertex shader you can use that also handles information like per-vertex colors and texture coordinates.
    precision highp float;
attribute vec3 aPosition;
attribute vec2 aTexCoord;
attribute vec4 aVertexColor;
uniform mat4 uModelViewMatrix;
uniform mat4 uProjectionMatrix;
varying vec2 vTexCoord;
varying vec4 vVertexColor;
void main() {
  // Apply the camera transform
  vec4 viewModelPosition = uModelViewMatrix * vec4(aPosition, 1.0);
  // Tell WebGL where the vertex goes
  gl_Position = uProjectionMatrix * viewModelPosition;
  // Pass along data to the fragment shader
  vTexCoord = aTexCoord;
  vVertexColor = aVertexColor;
}
Fragment Shaders
The fragment shader is responsible for the color output of our shader and is where we will do a lot of our shader programming. Here is a very simple fragment shader that will just display the color red:
| The fragment shader begins again with a line specifying the float |
| Similar to the vertex shader, our fragment shader also requires a The variable, |
Now that we have a vertex shader and a fragment shader, these can be saved to separate files (shader.vert and shader.frag, respectively) and loaded into our sketch using loadShader().
Uniforms: Passing data from sketch to shader
A simple shader like this can be useful by itself, but there are times when it’s necessary to communicate variables from the p5.js sketch to a shader. This is when uniforms come in. Uniforms are a type of variable that can be sent from a sketch to a shader. These make it possible to have much more control over a shader from JavaScript.
Uniforms are defined at the top of the file, outside of main(). You can access them in both your vertex and your fragment shader. In the example below, the value returned by the p5.js method millis() is passed to a ‘time’ uniform to introduce motion in the vertex shader.
It also works in the fragment shader. In the following example, we create a color uniform, myColor, that will allow us to change the color from the JavaScript part of our sketch. Just remember that in shaders, color channel values go from 0-1 instead of 0-255.
You can see the complete list of uniforms that p5.js provides for you in the p5.js WebGL Mode Architecture document.
Varyings: Passing data from vertex to fragment shader
Varying variables share data between the vertex shader and the fragment shader. This makes it possible to use position or other geometry data within our fragment shaders.
For example, you may want to use a shape’s texture coordinates in the fragment shader. These come in the form of a vec2, where coordinates go between 0 and 1. This initially comes in an attribute from p5.js, and those are only accessible in the vertex shader. Let’s look at what our standard vertex shader does to pass that to fragment shaders:
| |
| The texture coordinates initially come in the form of an |
| |
| Here, we declare a |
| |
| By assigning the attribute’s value to the varying variable, we are copying the data to a spot where the fragment shader can read it. |
|
Since we defined a varying called vTexCoord in the vertex shader, we can now use it in the fragment shader as well. Here is a simple fragment shader that maps the x value to the red channel and the y value to the blue channel. Note that while vTexCoord is defined per vertex in the vertex shader, its value is defined per pixel in the fragment shader. To get the per-pixel value, WebGL smoothly interpolates between the per-vertex values on each face.
| The result of using this shader on a 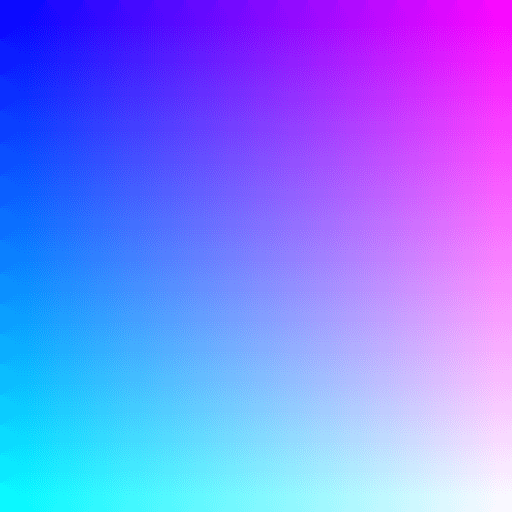 |
Filter Shaders
In p5.js, a filter is something that looks at all the pixels on the canvas and then replaces them with something else. There are many built-in filters that do things like invert the colors of the canvas, or apply a blur to the canvas contents. You can make your own filter by writing a fragment shader for it.
Filter shaders only need a fragment shader. Vertex shaders are primarily responsible for positioning shapes, and filters always apply to the whole canvas, so p5.js provides a default vertex shader for you. Rather than using loadShader, you use createFilterShader(src), passing in a string with your shader source code.
There are a number of uniforms that will be available to you in a filter shader, and you can read about all of them in the createFilterShader documentation. There are two main ones to know about to get started:
uniform sampler2D tex0is a texture containing the contents of the canvas.varying vec2 vTexCoordcontains the coordinates on the canvas of the current pixel, ranging from 0 to 1.
Combining these, texture2D(tex0, vTexCoord) returns the color of the current pixel on the canvas, which you can then modify. In this example, we create a custom black-and-white filter by replacing the red and green channels with the blue channel:
Another thing you might want to try is modifying the input to texture2D rather than modifying its output. Adjusting the texture coordinate used can create an offset from the original or a warp effect if the offset is different per pixel:
Conclusion
With these skills you can create some basic shaders, but shader programming can go much further, and many shader topics go beyond this tutorial. Shaders in p5.js can be a powerful tool for creating visuals, effects, and textures that can be mapped to your 3D geometry.
Want to keep learning more about shaders? Check out some of these websites!
- The Book of Shaders, a shader guide by Patricio Gonzalez Vivo and Jen Lowe.
- p5.js shaders, a shader guide by Casey Conchinha and Louise Lessél.
- Shadertoy, a massive online collection of shaders that are written in a browser editor.
- p5js Shader Examples, a collection of resources by Adam Ferriss.
- OpenGL ES 2.0 Specification, super technical specification for GLSL
- WebGL Quick Reference card, another slightly dense technical reference, but it contains lots of goodies about GLSL functions
- Shaderific GLSL ES reference, a somewhat slimmed-down reference for built-in GLSL functions and data types
Glossary
Shader
A special graphics card program that can efficiently produce many visual effects and filters.
GLSL
Graphics Library Shader Language (GLSL) is a programming language that is used to write shaders.
Uniform
A variable that is passed from your sketch to a shader.
Varying
A variable that is passed from the vertex shader to the fragment shader
Vector (vec2 / vec3 / vec4)
A data type that stores a group of numbers, most commonly two, three, or four, to represent colors, positions, and more.
Float
A data type that stores floating point numbers, which can have a decimal point.
Int
A data type that stores integers, which are whole numbers without a decimal.
Sampler
A data type that represents a texture being passed into the shader. Typically expressed as a sampler2D in GLSL.
Attribute
A GLSL variable that is generated in the p5.js sketch and made available in the vertex shader. For most situations these are provided by p5.js.
Texture
An image that is passed into a shader program. Can be sampled using the texture2D() function.
Type
A label describing the format of a piece of data, such as an int, a float, a vector, etc.
Vertex Shader
The part of a shader program that is responsible for positioning geometry in 3D space.
Fragment Shader
The part of a shader program that is responsible for the color and appearance of each pixel output by the shader.